
th6220wf2006 install manual
Welcome to the Honeywell TH6220WF2006 installation manual. This guide provides step-by-step instructions for installing, configuring, and maintaining your thermostat. Ensure proper setup for optimal performance and compatibility.
1.1 Overview of the Honeywell TH6220WF2006 Thermostat
The Honeywell TH6220WF2006 is a smart, Wi-Fi-enabled programmable thermostat designed for compatibility with various HVAC systems. It features a sleek design and advanced functionality, including remote access and energy-saving modes. Part of the T6 Pro Series, this thermostat offers precise temperature control and seamless integration with smart home systems. Its user-friendly interface and customizable scheduling options make it ideal for modern homes. The device also includes a UWP mounting system for easy installation and an optional decorative cover plate for added aesthetics.
1.2 Importance of Proper Installation
Proper installation of the Honeywell TH6220WF2006 is crucial for ensuring accurate temperature control and system compatibility. Incorrect wiring or mounting can lead to malfunctions, reduced efficiency, or even safety hazards. Following the manual’s step-by-step instructions ensures optimal performance, prevents damage to the thermostat or HVAC system, and maintains warranty validity. Always refer to the professional install guide to avoid common mistakes and guarantee a reliable setup for years to come.
System Requirements and Compatibility
This section outlines the system requirements and compatibility for the Honeywell TH6220WF2006 thermostat. Ensure your HVAC system is compatible, including heat pumps, furnaces, and central air conditioning. The thermostat supports various heating and cooling stages and requires specific wiring configurations. Verify technical specifications, such as Wi-Fi connectivity and software requirements, before installation to ensure seamless operation and optimal performance.
2.1 Compatible HVAC Systems (Heat Pumps, Furnaces, Central Air Conditioning)
The Honeywell TH6220WF2006 thermostat is compatible with a variety of HVAC systems, including heat pumps, furnaces, and central air conditioning. It supports single-stage and multi-stage heating and cooling systems, ensuring flexibility for different home setups. Compatibility varies by system type, so verify your system’s specifications before installation. Proper system compatibility is essential for efficient temperature control and to avoid operational issues. Always refer to the manual for detailed compatibility guidelines and requirements.
2.2 Technical Specifications and Features
The Honeywell TH6220WF2006 thermostat features a 7-day programmable schedule, geofencing, and smart recovery. It supports Wi-Fi connectivity for remote control via the Honeywell Home app. The thermostat is compatible with 802.11b, 802.11g, and 802.11n Wi-Fi standards. Additional features include a backlit display, energy-saving modes, and smart alerts. It also supports multi-stage heating and cooling systems, ensuring efficient temperature management. These features enhance home comfort while optimizing energy usage. Refer to the manual for detailed specifications and capabilities.

Pre-Installation Checklist
Ensure you have all tools, materials, and safety gear. Verify HVAC compatibility and system power is off before starting the installation process for the Honeywell TH6220WF2006.
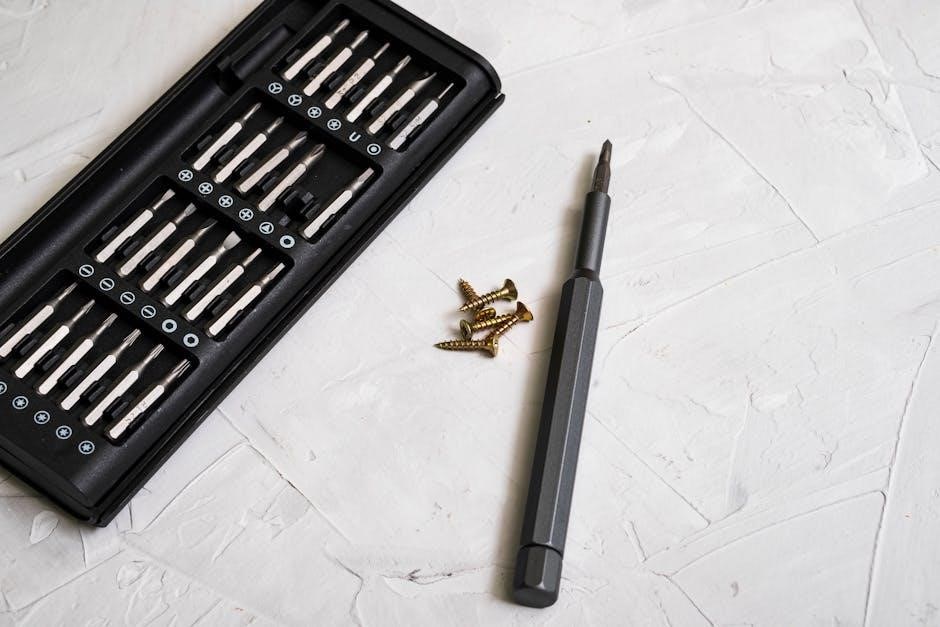
3.1 Tools and Materials Needed
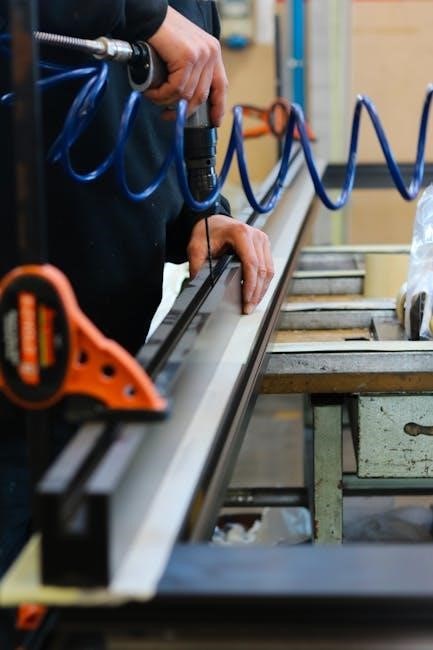
To install the Honeywell TH6220WF2006, gather essential tools and materials. You will need a screwdriver, drill, wall anchors, level, and a hammer. The UWP Mounting System and decorative cover plate are included. Ensure you have Wi-Fi connectivity for smart features. Refer to the manual for specific hardware details to ensure a smooth installation process and proper thermostat functionality. Prepare all items before starting to avoid delays or complications during setup. This ensures a seamless and efficient installation experience for your new thermostat.
3.2 Safety Precautions
Before installing the Honeywell TH6220WF2006, ensure all safety precautions are followed. Turn off power to the HVAC system at the circuit breaker. Verify voltage with a tester to avoid electrical shock. Handle wires carefully to prevent damage. Avoid over-tightening screws, as this may damage the thermostat or wall. Keep the device away from direct sunlight and moisture. Follow all local regulations for disposal of packaging materials. Properly ground the system to prevent electrical hazards. Always refer to the manual for specific safety guidelines to ensure a safe and successful installation process.
Mounting the Thermostat
Mounting the Honeywell TH6220WF2006 begins with opening the package and positioning the UWP on the wall. Level the system, mark hole positions, and drill. Use provided anchors and a hammer to secure the UWP, ensuring stability. Proper installation guarantees accurate temperature control.
4.1 UWP Mounting System Installation
Begin by opening the package and locating the UWP Mounting System. Position the UWP on the wall, ensuring it is level. Mark the hole positions according to the manufacturer’s guide. For drywall, drill 7/32-inch holes, and for other surfaces, use the recommended size. Gently tap the provided wall anchors into place using a hammer. Secure the UWP to the wall using the screws provided. Ensure the system is tightly fastened to guarantee stability and proper thermostat functioning. This step is critical for accurate temperature control and system compatibility.
4.2 Leveling and Drilling Holes
Ensure the surface is level before proceeding. Use a level tool to confirm the area is perfectly horizontal. Mark the hole positions based on the UWP Mounting System’s requirements. For drywall, drill 7/32-inch holes, while other surfaces may require a different size. Insert the provided wall anchors into the drilled holes. Secure the UWP Mounting System firmly to the wall using the screws provided. Double-check that everything is level and tightly fastened to avoid any installation issues.
4.3 Optional Cover Plate Installation
The optional cover plate enhances the thermostat’s appearance by covering extra space on the wall. Choose the appropriate size, such as the small cover plate (4-49/64 inches or 121mm). Align the cover plate with the UWP Mounting System, ensuring proper fitment. Snap or screw it into place using the provided screws, ensuring it doesn’t obstruct the thermostat’s screen or sensors. Refer to the manual’s diagrams for precise alignment and installation steps to maintain functionality and aesthetics.
Wiring and Connections
Proper wiring is essential for the Honeywell TH6220WF2006 thermostat’s functionality. Identify wiring terminals for compatibility with your HVAC system, ensuring accurate connections for heating, cooling, and power. Follow the manual’s step-by-step guide to connect wires securely, avoiding errors that could disrupt system operation. Verify all connections before powering on the thermostat to ensure safe and reliable performance.
5.1 Identifying Wiring Terminals
Correctly identifying wiring terminals is crucial for a successful installation of the Honeywell TH6220WF2006 thermostat. Begin by turning off the power to your HVAC system at the circuit breaker. Locate the existing thermostat wires and their corresponding terminals, typically labeled as R, W, Y, G, C, and others. Refer to the manual for terminal designations specific to your system. Ensure compatibility with your HVAC setup, such as heat pumps, furnaces, or central air conditioning. Use the UWP Mounting System if provided to simplify wire management. Match each wire to the correct terminal on the new thermostat, following the color coding or labeling guide. Double-check all connections before restoring power to avoid electrical issues or system malfunctions. Proper wiring ensures accurate temperature control and safe operation of your Honeywell TH6220WF2006 thermostat.
5.2 Connecting Wires to the Thermostat
After identifying the wiring terminals, proceed to connect the wires to the Honeywell TH6220WF2006 thermostat. Ensure the power to your HVAC system is off at the circuit breaker. Match each wire to the corresponding terminal on the thermostat, following the labeling guide provided in the manual. Use the UWP Mounting System for secure wire management. Tighten the terminal screws firmly to avoid loose connections. Double-check all wire connections before restoring power to prevent electrical issues. Proper wire connections are essential for accurate thermostat operation and system compatibility.
Initial Setup and Configuration
Power on the thermostat and follow the on-screen prompts to set up Wi-Fi connectivity. Configure basic settings like temperature units, time, and HVAC system type to complete initialization.
6.1 Powering On the Thermostat
After installation, power on the thermostat by ensuring the HVAC system is connected. The thermostat will automatically turn on, displaying the home screen. If the screen remains blank, check wiring connections. A blue LED indicates power status. Once powered, the thermostat will initiate a setup wizard to guide you through basic configuration. Follow on-screen instructions to complete initialization and prepare for Wi-Fi setup and system customization.
6.2 Setting Up Wi-Fi Connectivity
After powering on, the thermostat will automatically search for available Wi-Fi networks. Select your home network from the list, enter the password, and wait for confirmation. A successful connection is indicated by a confirmation message. Ensure the thermostat is placed in an area with a strong Wi-Fi signal for reliable performance. If issues arise, refer to the manual or reset the device to retry the connection process.
6.3 Configuring Basic Settings
Navigate to the settings menu to configure basic options. Set the temperature range, schedule, and system mode (Heat/Cool/Off). Choose between Fahrenheit or Celsius for temperature display. Enable features like auto-changeover or smart home integration. Save changes to ensure settings are applied. Refer to the manual for detailed instructions on customizing your thermostat for optimal performance and energy efficiency.
Advanced Features and Customization
Explore smart home integration, scheduling, and energy-saving features. Customize settings like geofencing and smart alerts to enhance efficiency and convenience. Tailor your system to your lifestyle.
7.1 Smart Thermostat Capabilities
The Honeywell TH6220WF2006 offers advanced smart features, including Wi-Fi connectivity for remote control via the Honeywell Home app. It supports geofencing, which adjusts temperatures based on your location, and smart alerts for system issues. The thermostat also integrates with popular smart home systems, enabling voice control through platforms like Amazon Alexa and Google Assistant. These capabilities enhance convenience and energy efficiency, allowing seamless adjustments and monitoring from anywhere; Proper setup ensures optimal performance and compatibility with your HVAC system.
7.2 Scheduling and Automation
The Honeywell TH6220WF2006 allows users to create custom daily schedules for precise temperature control. Automation features include automatic changeover between heating and cooling, as well as smart recovery, which adjusts settings to reach your desired temperature by the scheduled time. Vacation mode ensures energy savings while you’re away, and the thermostat can learn your routine to optimize settings. These features work seamlessly with smart home integrations, providing a convenient and energy-efficient experience tailored to your lifestyle and preferences.
7.3 Energy-Saving Features
The Honeywell TH6220WF2006 incorporates advanced energy-saving features to reduce consumption. Smart mode adjusts settings based on usage, while geofencing uses location to optimize heating/cooling. Energy reports provide insights into usage and savings, and the thermostat can automatically switch to energy-saving modes. Additionally, it supports energy-efficient algorithms that minimize energy waste without compromising comfort. These features help users save on utility bills while promoting eco-friendly practices, ensuring efficient and sustainable temperature control throughout the year.

Troubleshooting Common Issues
Troubleshooting common issues with the Honeywell TH6220WF2006 ensures optimal performance. Identify and resolve problems like connectivity errors, inconsistent temperatures, or faulty wiring. Refer to the manual for detailed solutions and tips to minimize downtime and optimize functionality.
8.1 Common Installation Mistakes
Common installation mistakes with the Honeywell TH6220WF2006 include improper wiring connections, misaligning the UWP mounting system, and not leveling the thermostat. Ensure all wires are securely attached to the correct terminals. Misalignment of the UWP can lead to uneven installation, affecting performance. Additionally, failing to follow safety precautions, such as turning off power to the HVAC system, can result in damage or injury. Always refer to the manual for precise instructions to avoid these errors.
8.2 Error Codes and Solutions
Common error codes for the Honeywell TH6220WF2006 include E1, E2, and E30. E1 indicates a wiring issue, often due to loose connections. E2 relates to temperature sensor malfunctions, requiring calibration or replacement. E30 signifies Wi-Fi connectivity problems, which can be resolved by restarting the router or checking network settings. Refer to the manual for detailed troubleshooting steps. Addressing these issues promptly ensures optimal thermostat performance and prevents system downtime.
8.3 Resetting the Thermostat
To reset the Honeywell TH6220WF2006, press and hold the Menu button until the reset option appears. Select Reset and confirm to restore factory settings. This clears schedules and preferences, resolving issues like persistent error codes (e.g., E1 or E30). After resetting, restart the system and reconfigure settings. If problems persist, consult the troubleshooting guide or contact Honeywell support for assistance. Regular resets can help maintain optimal performance and resolve software-related issues.

Maintenance and Upkeep
Regular maintenance ensures optimal performance. Clean the thermostat screen gently with a soft cloth and avoid harsh chemicals. Update software regularly for new features and bug fixes. Replace batteries if applicable to prevent downtime. Refer to the manual for detailed instructions.
9.1 Cleaning the Thermostat
Cleaning the Honeywell TH6220WF2006 thermostat is essential for maintaining functionality. Use a soft, dry cloth to gently wipe the screen and exterior. Avoid harsh chemicals or abrasive materials, as they may damage the display. For stubborn marks, lightly dampen the cloth with water, but ensure it is not soaking wet to prevent moisture damage. Regular cleaning prevents dust buildup and ensures accurate temperature readings and smooth touchscreen operation; Always power down the thermostat before cleaning for safety.
9.2 Updating Software
Regular software updates ensure the Honeywell TH6220WF2006 thermostat operates at peak performance. Connect the thermostat to Wi-Fi to automatically receive and install updates. If auto-update is disabled, navigate to the settings menu and select “Update Software.” Ensure the device remains powered and connected to Wi-Fi during the update process. Manual updates can be performed by downloading the latest firmware from Honeywell’s official website and following on-screen instructions. Updates may improve functionality, security, and compatibility with smart home systems.
9.3 Battery Replacement (if applicable)
Some Honeywell TH6220WF2006 models may require battery replacement. Refer to the manual to confirm if your thermostat uses batteries. To replace, turn off power to the system. Remove the thermostat from the wall plate and locate the battery compartment. Insert the new batteries as indicated, ensuring correct polarity. Replace the compartment and reattach the thermostat. Test functionality to ensure proper operation. Use high-quality, alkaline batteries for optimal performance. Dispose of old batteries responsibly. Always follow safety guidelines during replacement to avoid damage or electrical issues.

Manufacturer Support and Resources
Honeywell offers comprehensive support for the TH6220WF2006, including online manuals, customer service contact, and warranty information. Visit their website for downloadable guides and troubleshooting tips.
10.1 Contacting Honeywell Support
For assistance with your TH6220WF2006, Honeywell provides multiple support channels. Visit their official website to access online manuals, contact forms, and phone support options. Live chat and email support are also available for troubleshooting. Additionally, downloadable guides and FAQs can be found on their resource page. Ensure to have your product serial number ready for quicker assistance. Honeywell’s customer service team is available to address installation, configuration, and maintenance queries. Their support page also offers warranty details and repair options for defective units.
10.2 Accessing Online Manuals and Guides
To access the TH6220WF2006 installation manual and guides, visit Honeywell’s official website. Navigate to the support page and search for your model number. Downloadable PDF manuals, including the Professional Install Guide and user manuals, are available. Additionally, Honeywell provides troubleshooting tips, wiring diagrams, and FAQs. For comprehensive resources, visit the Honeywell Home website or authorized distributors. These materials ensure smooth installation, configuration, and maintenance of your thermostat. Utilize these guides to resolve issues and optimize performance.
10.3 Warranty Information
The Honeywell TH6220WF2006 thermostat is backed by a comprehensive warranty. For detailed terms, visit Honeywell’s official website. The warranty covers manufacturing defects and ensures product reliability. Contact Honeywell support for warranty-related inquiries or claims. Proper installation, as outlined in the manual, is essential to maintain warranty validity. Honeywell’s commitment to quality ensures customer satisfaction and product durability.
Thank you for following the Honeywell TH6220WF2006 installation manual. Proper installation ensures optimal performance and efficiency. This guide has provided detailed steps from setup to advanced features. For any issues, refer to the troubleshooting section or contact Honeywell support. Regular maintenance will extend the thermostat’s lifespan. Enjoy the convenience and energy savings of your new smart thermostat. If you need further assistance, visit Honeywell’s official website for additional resources and support.