
singer sewing machine 2517c manual
The Singer 2517C Sewing Machine is a versatile, mechanical sewing machine designed for both beginners and experienced sewists. It offers a front-loading bobbin system, a straight stitch plate to prevent fabric jamming, and adjustable stitch length and width, making it ideal for various sewing projects. This machine is perfect for those seeking durability, ease of use, and customization options to enhance their sewing experience.
1.1 Overview of the Singer 2517C Sewing Machine
The Singer 2517C Sewing Machine is a mechanical sewing machine designed to cater to both beginners and experienced sewists. It offers a front-loading bobbin system, a straight stitch plate, and adjustable stitch length and width, making it versatile for various sewing projects. The machine is known for its durability, ease of use, and customization options, ensuring a seamless sewing experience. With its user-friendly interface and essential features, the Singer 2517C is ideal for crafting, repairing, and creating a wide range of fabrics; Its compact design and lightweight construction make it a practical addition to any sewing workspace. This machine is a reliable choice for those seeking a balance between functionality and affordability.
1.2 Key Features and Benefits
The Singer 2517C Sewing Machine boasts a range of features that make it a versatile and efficient tool for sewing enthusiasts. It includes a front-loading bobbin system, which simplifies the process of inserting and winding bobbins, reducing the risk of jams. The machine also features a straight stitch plate, designed to keep fabric steady and prevent bunching. With adjustable stitch length and width, users can customize their stitching to suit various fabrics and projects. Additionally, the Singer 2517C is lightweight and durable, making it easy to transport and maintain. Its mechanical design ensures reliability and ease of use, catering to both beginners and experienced sewists. These features combined make the Singer 2517C an excellent choice for crafting, repairs, and creating a wide variety of sewing projects with precision and ease.
Understanding the Machine Components
The Singer 2517C Sewing Machine features a front-loading bobbin system, a straight stitch plate, and essential components like tension dials, stitch selectors, and a presser foot lifter.
2.1 Exterior Parts Identification
The Singer 2517C Sewing Machine features a durable exterior design with key components easily accessible. The front-loading bobbin system is located on the machine’s base, while the tension dials and stitch selectors are positioned on the top and side for easy adjustment. The presser foot lifter is conveniently located on the back, allowing for smooth fabric handling. Additional exterior parts include the spool pin, take-up lever, and stitch length regulator. These components are designed for intuitive operation, ensuring a seamless sewing experience. Identifying these parts is essential for proper machine setup and maintenance, as outlined in the manual.
2.2 Interior Parts and Their Functions
The interior of the Singer 2517C Sewing Machine houses essential components that ensure smooth operation. The bobbin case is centrally located and plays a crucial role in holding the bobbin and facilitating stitch formation. The hook mechanism, which interacts with the needle, is another vital interior part, responsible for looping the thread around the bobbin. Additionally, the feed dogs, located beneath the stitch plate, move the fabric forward during sewing. The shuttle hook driver connects to the hook assembly, ensuring synchronized movement for consistent stitching. Other interior components include gears and levers that transmit power from the motor to the needle and feed dogs. Regular maintenance, such as cleaning and oiling, is necessary to keep these parts functioning optimally, as detailed in the manual.

Threading the Singer 2517C Sewing Machine
Proper threading is essential for the Singer 2517C Sewing Machine to function smoothly. Follow the manual’s step-by-step guide to ensure correct thread placement and tension for optimal stitching.
3.1 Step-by-Step Guide to Threading the Machine
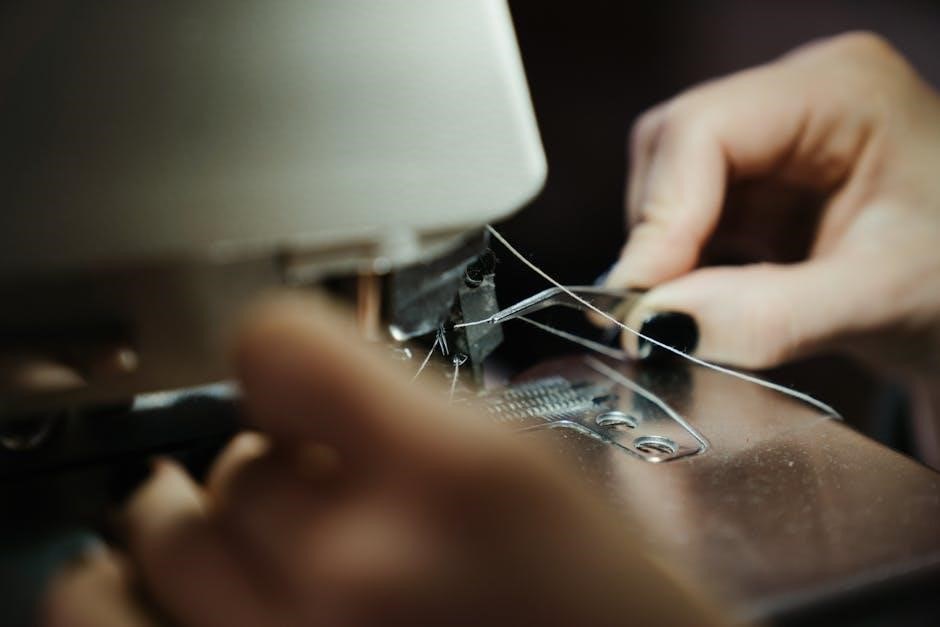
Threading the Singer 2517C Sewing Machine requires attention to detail to ensure proper stitch formation. Begin by placing the spool on the spool pin and pulling the thread through the tension discs. Follow the threading diagram on the machine or in the manual to guide the thread correctly through the take-up lever and stitch regulator. Insert the thread into the needle’s eye, leaving a small tail. Gently pull the thread to ensure it is seated properly in the tension disc. Avoid twisting or pulling the thread too tightly, as this can cause uneven tension. Once threaded, test the machine by sewing a few stitches on a scrap fabric to check for correct thread flow and tension. Proper threading ensures smooth operation and consistent stitch quality.
3.2 Common Threading Mistakes and Solutions
One common mistake when threading the Singer 2517C is not following the correct thread path, which can lead to uneven stitches or machine jamming. Ensure the thread passes through the tension discs and take-up lever properly. Another issue is forgetting to pull the thread tail gently after threading, which can cause loose stitches. If the thread is not seated correctly in the tension disc, it may result in inconsistent tension. To fix this, rethread the machine, making sure the thread clicks into place. Twisted or tangled thread can also cause problems; always use high-quality thread and avoid over-twisting. If issues persist, consult the manual or reset the tension by gently pulling the thread while sewing a test stitch on scrap fabric.
Bobbin and Stitch Setup
The Singer 2517C features a front-loading bobbin system and adjustable stitch settings, ensuring easy setup and customization for various sewing projects, ideal for all skill levels.
4.1 Inserting and Winding the Bobbin
Inserting and winding the bobbin on the Singer 2517C is a straightforward process. Start by preparing your bobbin, ensuring it is compatible with the machine. Remove any leftover thread and place the bobbin on the winder. Thread the end of the thread through the bobbin’s hole and wind it evenly. Once wound, cut the thread and insert the bobbin into the bobbin case, ensuring it clicks securely into place. Properly winding and inserting the bobbin is essential for maintaining consistent stitch quality and preventing tangling. Always refer to the manual for specific guidance on tensions and alignment to ensure optimal performance.
4.2 Adjusting Stitch Length and Width
Adjusting the stitch length and width on the Singer 2517C Sewing Machine allows for customization based on fabric type and sewing needs. To adjust the stitch length, locate the stitch length dial on the machine and turn it clockwise for shorter stitches or counterclockwise for longer stitches. Similarly, the stitch width dial adjusts the width of the stitch, with settings typically ranging from 0 to 5mm. Always test the stitch settings on scrap fabric before sewing your final project to ensure the desired results. The machine’s manual provides a stitch chart to guide you in selecting the appropriate settings for various fabrics and techniques.
Maintenance and Cleaning
Regular maintenance ensures the Singer 2517C Sewing Machine runs smoothly. Clean lint from the bobbin area, oil moving parts, and check for dust buildup to prevent issues.
5.1 Regular Maintenance Tips
Regular maintenance is essential to ensure the Singer 2517C Sewing Machine operates efficiently. Turn off the machine and unplug it before cleaning. Remove lint and debris from the bobbin area and feed dogs using a soft brush. Lightly oil the machine’s moving parts as specified in the manual to prevent friction and wear. Avoid using harsh chemicals or excessive oil, as this can damage components. Use a soft, dry cloth to wipe down the exterior, keeping it free from dust. Regularly check for loose screws or parts and tighten them if necessary. These simple steps will extend the machine’s lifespan and maintain its performance. Proper care ensures smooth stitching and prevents mechanical issues, keeping your Singer 2517C in excellent working condition for years.
5.2 Cleaning the Machine and Oil Replacement
Cleaning the Singer 2517C Sewing Machine is crucial for maintaining its performance. Use a soft brush or lint brush to remove dust and thread fragments from the bobbin area, feed dogs, and stitch plate. Dampen a clean cloth with water or mild sewing machine cleaner and gently wipe the exterior, avoiding any openings. For oil replacement, use high-quality sewing machine oil. Locate the oil ports as indicated in the manual and apply a few drops. Turn the handwheel to distribute the oil evenly. Excess oil can be wiped off with a clean cloth. Regular oil replacement ensures smooth operation and prevents rust. Always refer to the manual for specific oil replacement intervals and locations to keep your machine in optimal condition and extend its lifespan.
Troubleshooting Common Issues
Identify and resolve common issues with the Singer 2517C Sewing Machine, such as fabric jamming, uneven stitching, and bobbin problems. Regular maintenance and proper threading often prevent these issues, ensuring smooth operation and consistent stitch quality. Refer to the manual for detailed solutions to address specific problems effectively.
6.1 Fabric Jamming Solutions
Fabric jamming is a common issue that can be resolved by following a few simple steps. First, turn off the machine and unplug it for safety. Gently remove the jammed fabric without pulling forcefully, as this could damage the machine. Check for loose threads or debris around the needle, presser foot, and bobbin area. Ensure the bobbin is properly inserted and seated. If the issue persists, consult the manual for specific guidance on clearing jams. Regular cleaning and proper threading can help prevent fabric jams. By addressing the problem methodically, you can restore smooth operation and continue sewing efficiently.
6.2 Issues with Stitch Quality and Adjustments
Ensuring optimal stitch quality requires attention to thread tension, bobbin alignment, and fabric handling. If stitches appear uneven or loose, check the upper thread tension and adjust it as needed. Regularly rethreading the machine with the presser foot up can help maintain consistent tension. For puckering or tight stitches, adjust the stitch length and width settings. Using the correct needle type and size for your fabric is crucial. If issues persist, consult the manual for guidance on tension dial calibration. Proper fabric alignment and steady movement during sewing also contribute to smooth stitch formation. By addressing these factors, you can achieve professional-looking results and extend the machine’s performance.
Accessories and Customization
The Singer 2517C Sewing Machine supports various presser feet and accessories, such as zigzag and zipper feet, enhancing versatility. Customizing stitch settings and using additional tools can optimize performance for specific projects, ensuring tailored results and expanded creative possibilities.
7.1 Compatible Presser Feet and Accessories
The Singer 2517C Sewing Machine is compatible with a variety of presser feet, including zigzag, zipper, and buttonhole feet, which expand its functionality for diverse sewing tasks. These accessories are designed to handle specific fabrics and projects, ensuring precise results. Users can also utilize additional tools like edge guides and seam rippers to enhance their sewing experience. The machine supports optional attachments that simplify tasks such as hemming, quilting, and embroidery. For optimal performance, it is recommended to use genuine Singer accessories, which are readily available on Singer’s official website or through authorized dealers. These compatible parts ensure seamless integration and maintain the machine’s efficiency. Regularly updating or adding new accessories can also keep your sewing machine in top condition and ready for any creative project.
7.2 Customizing Your Sewing Experience
Customizing your sewing experience with the Singer 2517C Sewing Machine is straightforward and enhances creativity. Users can adjust stitch length and width to suit various fabrics and projects, ensuring optimal results. The machine also allows for thread tension adjustments, enabling precise control over stitching. Additionally, optional attachments like quilting guides and embroidery hoops can be added to expand functionality. Personalizing settings, such as pre-setting stitch lengths for common fabrics, streamlines the sewing process. The Singer 2517C supports customization through its mechanical design, making it adaptable to individual sewing preferences. By exploring these features, users can tailor their sewing experience to achieve professional-looking results and enjoy a more personalized approach to their projects.
Advanced Sewing Techniques
The Singer 2517C Sewing Machine supports advanced techniques like sewing various fabric types, handling zippers, and buttons with precision, ensuring professional-looking results for experienced sewists.
8.1 Sewing Different Fabric Types
The Singer 2517C Sewing Machine is designed to handle a variety of fabrics, from lightweight cotton to heavy denim. Its adjustable stitch length and width allow for customization based on fabric thickness, ensuring even stitching. For delicate fabrics, a shorter stitch length is recommended, while thicker materials benefit from longer stitches. The machine’s straight stitch plate helps prevent fabric jamming, making it ideal for working with slippery or stretchy fabrics. By adjusting the tension and using the right needle size, users can achieve professional results across different fabric types. This versatility makes the Singer 2517C a reliable choice for sewists tackling diverse projects.
8.2 Tips for Sewing Zippers and Buttons
When sewing zippers and buttons with the Singer 2517C, use the appropriate presser feet for precision. For zippers, attach the zipper foot to align the edges perfectly and maintain consistent stitching. Shorten the stitch length for secure zipper installation. For buttons, use the buttonhole foot to create uniform buttonholes. Sew buttons by placing them under the presser foot and using a straight stitch or zigzag to secure them tightly. Always test stitches on scrap fabric before working on your final project. Use a heavy-duty needle for thicker fabrics or multiple layers. These tips ensure professional-looking results when adding zippers and buttons to your projects.
Safety Precautions
Always keep loose clothing and long hair tied back while sewing. Avoid distractions and keep children away from the machine. Use the machine on a stable surface and unplug it when not in use. Never touch sharp parts or hot components. Follow all safety guidelines in the manual to ensure safe operation and prevent accidents.
9.1 General Safety Guidelines
Always prioritize safety when operating the Singer 2517C Sewing Machine. Keep loose clothing and long hair tied back to avoid entanglement. Ensure the machine is placed on a stable, flat surface to prevent accidental tipping. Avoid distractions while sewing, and never leave the machine unattended when in use. Keep children and pets away from the machine to prevent accidents. Unplug the machine when not in use or during maintenance. Never touch sharp parts, such as the needle or bobbin area, to avoid injuries. Follow all guidelines outlined in the manual to ensure safe and efficient operation. Proper safety practices will help protect you and extend the machine’s lifespan.
9.2 Child Safety and Machine Handling
Ensure child safety by keeping the Singer 2517C Sewing Machine out of children’s reach. Store the machine in a secure location when not in use to prevent accidental operation. Supervise children closely if they are nearby while sewing. Teach children not to touch or handle any machine parts, especially the needle and moving components. Prevent access to small parts like bobbins or needles to avoid choking hazards. Always turn off and unplug the machine when not in use to eliminate the risk of unintended startup. Proper machine handling and storage are essential to safeguarding children and ensuring a safe sewing environment. Educate children about the dangers of sewing machines and the importance of responsible handling. By taking these precautions, you can protect your children and maintain a safe workspace. Regularly inspect the machine for any loose parts that could pose a risk to children. Always follow the manufacturer’s guidelines for safe operation and storage to enhance child safety. This approach ensures a secure and efficient sewing experience while protecting your family. Proper machine handling and storage are crucial for maintaining safety and longevity.
Warranty and Support
The Singer 2517C Sewing Machine comes with a comprehensive warranty, ensuring coverage for parts and labor. For support, visit Singer’s official website or contact their customer service team for assistance with troubleshooting, repairs, or general inquiries. Additionally, the manual provides detailed guidance for maintenance and operation, helping users maximize their sewing experience. Singer’s commitment to quality and customer satisfaction ensures reliable support for all your sewing needs.
10.1 Understanding Your Warranty
The Singer 2517C Sewing Machine is backed by a comprehensive warranty program designed to protect your investment. The warranty typically covers defects in materials and workmanship for a specified period, ensuring your machine performs optimally. For most Singer sewing machines, the warranty includes 25 years on mechanical parts, 5 years on electrical components, and 1 year on labor and adjustments. However, normal wear and tear, misuse, or improper maintenance are not covered. To claim warranty service, contact Singer Customer Support with your machine’s serial number and a detailed description of the issue. Always refer to your manual for specific warranty terms, as conditions may vary. Understanding your warranty ensures you can address any issues promptly and maintain your machine’s performance for years to come.
10.2 Contacting Singer Customer Support
For assistance with your Singer 2517C Sewing Machine, Singer Customer Support is readily available to address your inquiries and concerns. You can reach their support team via phone, email, or through their official website. Live chat options are also available for immediate help. Before contacting, ensure you have your machine’s serial number and a detailed description of the issue. Singer’s support team is trained to provide troubleshooting guidance, repair services, and warranty-related assistance. Visit their official website to find the most up-to-date contact information and support resources. Additionally, Singer offers extensive online support, including downloadable manuals, FAQs, and instructional guides. Their customer service is designed to help you maximize your sewing experience and resolve any issues promptly and efficiently.
The Singer 2517C Sewing Machine is a reliable choice for sewists of all skill levels. With its user-friendly design and comprehensive manual, it empowers creativity and precision. By following the guide, users can unlock its full potential, ensuring years of satisfying sewing experiences. Happy sewing!
11.1 Maximizing Your Sewing Machine’s Potential
To maximize the Singer 2517C Sewing Machine’s potential, explore its versatile features and capabilities. The machine’s front-loading bobbin system and adjustable stitch settings allow for precise control over your projects. By familiarizing yourself with the manual, you can unlock advanced techniques and customize your sewing experience. Experiment with different fabric types, from delicate fabrics to heavy-duty materials, to see how the machine adapts. Regular maintenance, as outlined in the manual, ensures optimal performance and longevity. Don’t hesitate to explore creative projects, such as sewing zippers, buttons, or intricate designs. With consistent use and practice, you’ll master the Singer 2517C, making it an indispensable tool for all your sewing needs. Happy sewing!
11.2 Importance of Following the Manual
Following the Singer 2517C Sewing Machine manual is essential for optimal performance and longevity. The manual provides clear, step-by-step instructions for setup, operation, and maintenance, ensuring you understand how to use the machine correctly. By adhering to the guidelines, you can avoid common issues like fabric jamming or stitch quality problems. The manual also offers troubleshooting tips and customization options, helping you tailor your sewing experience. Whether you’re a beginner or an experienced sewist, the manual serves as a valuable resource to unlock the machine’s full potential. Regularly referring to it ensures you’re using the machine safely and efficiently, maximizing your satisfaction and the machine’s performance. Always keep the manual handy for quick reference and to maintain your Singer 2517C in prime condition.